Don’t Stop Believing (school lunches)

Don’t Stop Believing (school lunches)

Way way back before Zach and Scarlet were teens I had this great idea to make my own homemade versions of their favorite restaurant lunches and freeze them ahead of time (blog post here). I had a “menu” they could select from the night before and it was fun and healthy with minimal packaging waste. Eventually though they wanted to do more hot lunches at school and simpler sandwiches and the homemade ones seemed to come home largely uneaten. I remember feeling defeated but succumbed to the convenience of things such as uncrustables and individually prepackaged snacks because that’s what kids ultimately like right? Fast forward to this summer and my amazing now teenaged daughter Scarlet started planning make ahead freezer lunches for herself and her sisters complete with menus and meal plans (for the record Zach still prefers the pizza at High School). I asked her why she was planning ahead so early for school lunches and shouldn’t we see what the hot lunch program would be at their new school first? She looked horrified and said she really liked when I used to do their lunches this way and missed it and she wanted to have the little girls experience special homemade lunches with complete meal plans. My heart exploded!! All this time I felt that my efforts had gone unnoticed when they had truly planted seeds. Lesson learned for me: Even if things don’t seem obviously Pinterest worthy, easy, perfect, appreciated, organized, etc. etc. DON’T STOP TRYING! I can’t say how much this has affected and reinvigorated my view of parenting and inspired some very positive changes. Making the effort means more to them than the act itself and as long as you continually care and try they really do appreciate it (even if some of their lunches turn into science experiments in their backpacks and they complain about getting extra veggies). So we got to work printing out a weekly menu and Scarlet assembled and froze 40 lunches!! Did I mention she’s amazing?? We recently learned Scarlet has celiac so she needs to avoid gluten but that didn’t stop her from assembling and freezing gluten free waffle pizzas and burritos with homemade tortillas. For the little sisters she froze homemade whole grain pancakes, quesadillas and uncrustables (the trick with those is to put peanut butter on both sides of the bread and the jelly in the middle so it doesn’t get soggy).

Here is our weekly plan for each girl:

Scarlet:

Screenshot 2018-09-10 13.02.53.png

Frankie:

Screenshot 2018-09-10 13.01.37.png

Alexis:

Screenshot 2018-09-10 12.59.12.png

It didn’t stop there either. Once we were making lists the lists kept coming. Morning routine! Evening routine! Family dinner plan (post on that coming soon)! All things I used to do that went by the wayside one way or another due to stress and or convenience. In reality though I can honestly say that after a couple weeks of school these lists are saving my sanity so the extra effort pays off. My family likes them too and Alexis even told her teacher she was looking forward to dinner last Friday because “Friday was homemade pizza night”! So welcome to fall and school and happy chaos because no matter how organized you are there will still be a little happy chaos. At least that’s the case in our household with four children, six dogs, seven cats, loads of poultry and a horse (of course) and we are a-ok with that. Speaking of which how hilarious is this before and after first day of pre-k picture of Alexis? Happy Fall!

fullsizeoutput_5cef.jpeg

Whole Grain Bagels

Whole Grain Bagels

My husband and I LOVE bagels. Everywhere we’ve lived we’ve had our morning bagel spot that we could usually walk to. We would sit at the little cafe tables peacefully reading whole sections of the newspaper with our coffee and bagels. Planning out our carefree days. Take in a movie perhaps? Do a little shopping? Maybe try that new chic restaurant for dinner? How lovely!  Once we had kids and moved to the country every single one of those scenarios changed. Breakfast is always at home now and newspaper articles get skimmed through on our iPads while planning out our daily kids shuffle and packing school lunches. Who needs to be where, when and how do we end up back home in time for dinner without forgetting anybody? Sometimes it’s a roshambo, others it’s a coin toss. In any case it’s not the leisurely experience we once had. Someday though we will get back to that and will miss these chaotic mornings I’m sure. But we still have bagels! And LOTS of coffee! For convenience we’ve bought the fluffy airy dough balls that are called bagels at Costco. They are okay but not great by any means and certainly not healthy as they are all white flour. Whole Foods has sprouted bagels which are better but between our veggie and meat farm boxes which get delivered my only grocery shopping is a monthly Costco stock up so I’d rather not enter the Whole Foods parking lot vortex just for bagels. We decided to try baking our own and it wasn’t that hard! I went to my favorite whole grain baking source, Peter Rinehart and found the best recipe. These bagels are more like a New York style bagel. Firm and hearty but with lots of flavor. 

These aren’t too time consuming  at any one moment but there are a lot of steps: mixing, resting, rising, shaping, proofing, boiling and finally baking. From mixing to eating is somewhere around five hours so plan accordingly. Don’t start them at 7:00pm! Actually you can stick the dough in the fridge at any interval and put it on hold so go ahead. Just bring it back to room temperature before moving on with your steps. 

Start by measuring the dry ingredients (this is really precise so definitely weigh the flour) into the bowl of a stand mixer and pulse (so flour doesn’t fly everywhere) with the paddle attachment for 30 seconds. 


Then dissolve the barley malt syrup (I get this on Amazon), honey or agave in tepid water (if you spray the measuring spoon with cooking spray it will slide right off. I tried to demonstrate but of course using a black Tablespoon isn’t giving off much contrast so just trust me!)   


and slowly incorporate into the dry mixture, still using the paddle on low for 1 minute. You want to lock the mixer here because this dough is very stiff.  

 Remove the paddle and let the dough rest uncovered for five minutes. Switch to the dough hook and mix on low for two minutes. 


The dough is quite firm, don’t be alarmed! Turn it out onto a floured surface and form it into a ball. 

  
Oil a bowl (at least twice the size of the dough ball) and roll the dough in the oil to coat all sides. Cover it with plastic and leave it in a warm spot to rise for 2 hours. 


It should increase 1 1/2 times. 


Turn it out onto a work surface and divide it into 8 pieces. 


I like to weigh them to make them as even as possible. Each piece should be about 3.8oz. 


Get a cookie sheet lined with a baking mat or parchment and spray it with a little oil. Now shaping can be done two different ways. 

  1. Roll it into a long snakey shape (about 8″) making the ends a little thinner, overlap the ends and work them together to form a classic bagel shape. 
  2. Form a ball with the dough, poke a hole in the middle with your finger and swirl it around until the hole is an inch or so large. 


Place formed bagels on the oiled sheet, spray tops with a little more oil to keep from sticking, cover with plastic and leave to proof for an hour.  


 Towards the end of proofing get a second cookie sheet ready with a baking sheet or parchment, preheat the oven to 425 degrees and boil 4-6 inches of water. Add in 2T baking soda (the water will bubble up so make sure there’s room in the pot) and place 2 bagels in at a time to boil for 1 minute. Flip after 30 seconds then remove the baking sheet after another 30 seconds. 


Sprinkle toppings onto the wet bagels so they stick. We used a seed mixture of chia, poppy, sesame, carroway and some pink Himalayan sea salt. Then bake for 10-12 minutes, rotate pan and bake for another 10-12 minutes. 

Let cool and ENJOY!


They’re a little rustic looking which just makes it more obvious they are homemade, thus filled with whole grain love. 


Toast and serve with cream cheese or butter. They are especially great with homemade jam from my friend Lisa Steiny!

Seal of approval!


So now we have our coffee and do the morning kids soduko shuffle puzzle over homemade whole grain bagels. The kids are eating them too! A double batch lasts us about a week. They freeze well too so if there’s a good baking day make up a bunch and just keep out a weeks worth at a time. 

PETER RINEHART’S WHOLE GRAIN BAGELS

makes 8

INGREDIENTS

510 grams / about 4 1/4 cups sprouted whole wheat flour or whole wheat flour

1 ¼ teaspoons fine sea salt

1 ¼ teaspoons instant yeast

1 ⅔ cups plus 1 1/2 teaspoons / 408 milliliters lukewarm water

1 tablespoon barley malt, agave syrup, or honey

2 tablespoons baking soda, malt syrup or honey for boiling water bath

2 to 4 tablespoons topping of your choice: sesame seeds, poppy seeds, caraway seeds, nigella seeds, chia seeds

DIRECTIONS

MIXING

Start by measuring the dry ingredients into the bowl of a stand mixer and pulse with the paddle attachment for 30 seconds. Then dissolve the barley malt syrup in tepid water. Slowly incorporate into the dry ingredients  (still using the paddle) on low for 1 minute. Remove the paddle and let the dough rest uncovered for five minutes. Switch to the dough hook and mix on low for two minutes. The dough is quite firm, don’t be alarmed! 

RISING

Turn it into a floured surface and form it into a ball. Oil a bowl (at least twice the size of the dough ball) and roll the dough in the oil to coat all sides. Cover it with plastic and leave it in a warm spot to rise for 2 hours. It should increase 1 1/2 times. 

SHAPING

Turn the dough onto a work surface and divide it into 8 pieces. I like to weigh them to make them as even as possible. Each piece should be about 3.8oz. Get a cookie sheet lined with a baking mat or parchment and spray it with a little oil. Now shaping can be done two different ways. 

  1. Roll it into a long snakey shape (about 8″) making the ends a little thinner, overlap the ends and work them together to form a classic bagel shape. 
  2. Form a ball with the dough, poke a hole in the middle with your finger and swirl it around until the hole is an inch or so large. 

PROOFING

Place formed bagels on the oiled sheet, spray tops with a little more oil to keep from sticking, cover with plastic and leave to proof for an hour. 

BOILING

Towards the end of proofing get a second cookie sheet ready with a baking sheet or parchment, preheat the oven to 425 degrees and boil 4-6 inches of water. Add in 2T baking soda (the water will bubble up so make sure there’s room in the pot) and place 2 bagels in at a time to boil for 1 minute. Flip after 30 seconds then remove the baking sheet after another 30 seconds. 

BAKING

Sprinkle toppings onto the wet bagels so they stick. Then bake for 10-12 minutes, rotate pan and bake for another 10-12 minutes. 

Cool completely on a wire rack and store in an airtight container. 

Roast Chicken, the Thomas Keller way

Roast Chicken, the Thomas Keller way

I’ve been roasting chicken wrong for years! At last though I’ve seen the light and learned the method and our Sunday dinners will never be the same again. I took a cooking class from Sir Keller a few years ago and thought I had gathered the main tips in my head. Always temper your meat (bring it to room temperature before cooking) and make sure your chicken is really dry before cooking so the skin will be crispy. Well, my friends, that’s just the beginning of the story! There’s so much more to it! 

Here are all the things I’ve been doing wrong. 

There should be a big red eeeeeeeenk button by each one:

🚫 Rubbing it with oil and or butter. 

🚫 Stuffing the cavity with lemon, onion and herbs (which creates steam and therefore less crispy skin).

🚫 Using a roasting pan.

🚫 Basting the skin every 20 minutes. 

Here is the RIGHT way:

Start by brining the chicken for 6 hours. This is optional but I was going for the whole experience here. 

Boil enough water to cover the chicken with 1/2c salt, 6 bay leaves, 6 garlic, 1/8c honey and 1 bunch of Italian parsley for one minute until the salt dissolves. Then cool to room temperature and place the rinsed chicken inside the pot and let her swim in the refrigerator for 6 hours.   After 6 hours remove from the brine, rinse, pat dry and salt and pepper the cavity. Leave out for 30 minutes or refrigerate uncovered until 30 minutes prior to cooking (we want it tempered and dry remember). 

Preheat the oven to 475 degrees. Truss (another thing I’ve been doing wrong… See the video below for instructions.)

Salt and pepper the skin and heat a cast iron skillet (or other oven proof pan on the stove. Once hot add 1 tablespoon of safflower oil and swirl it around to coat. Preheating the pan keeps the skin from sticking and speeds up the cooking time as the pan doesn’t need to absorb heat in the oven so the energy all goes to the chicken.   

 
 Place the chicken breast up and legs back (away from the handle) in the skillet and pop her in the oven.   475 degrees is hotter then I’ve cooked a chicken before. It only took 45 minutes (usually takes 60-90). I did need to cover it with foil about 30 minutes in. We were alerted to this need by the smoke alarm (always a sign of a good dinner cooking). I did check it every 15 minutes and rotated the pan once. No basting during the cooking time though! 

Once it’s done, move to a cutting board, add a tablespoon of thyme leaves to the skillet and sauté for a minute, THEN baste the chicken with the pan juices and thyme. That crispy dry skin sucks up the jus just like that. Leave her to rest for 10 minutes. 

Not one to waste good flavor and an already dirty dish I put that skillet right back to work and sautéed some kale with a little olive oil and corse salt while the chicken was resting. 

Served alongside stuffing and kale we all remarked on how juicy yet crispy this chicken was. We really love roast chicken here, now we know how to really cook it!  

Here you can see the master himself making a slightly different variation of his famous roast chicken (over root vegetables):
Thomas Keller: Bouchon Roast Chicken

Everyone should have the Bouchon cookbook collection. The recipes and descriptions are very precise yet simple, my favorite combination!

The grand finale of this meal was this banana bread bundt cake Scarlet made from Pioneer Woman.   

  She followed the recipe but then added 1/2c of chocolate chips at the end and glazed it with a butter glaze.  

Banana Bread Bundt Cake
Butter Glaze

And because we were out of powdered sugar and didn’t feel like driving for an hour to go to the grocery store and back we made our own!

In a blender put a 1T to 1c ratio of cornstarch and sugar and blend. Voila!! I love life hacks like this!  

Kitchen Renovation

Kitchen Renovation

We got a little carried away with our master bedroom renovation and wound up doing our kitchen as well. Unlike most people we love remodeling and don’t ever want it to stop. We kept our contractor there much longer than originally planned as we kept finding more to do (bleach and seal the exterior of the house, fix all the windows, install new gutters, build a craft room…). When we started ripping things out for our master bedroom and saw the old cabinets leave the pantry and bath we couldn’t wait to tear out the kitchen. We have a nice amount of space in our kitchen but mostly the countertops on the side wall were a dumping ground for people’s clutter and all the prep was done on this flimsy little island we bought as a temporary cutting block when we moved in (nearly 12 years ago…). We started thinking about the idea of using all freestanding cabinets to give it an antique feel. The only area I couldn’t figure out for that was the corner which housed the sink and dishwasher so we wound up doing a fusion of free standing and built in.

For the open wall which had cabinets and open shelving we ordered a huge sideboard and hutch with mesh grating in the upper doors so you can see the shelves.


This eliminated the counter that seemed to be the biggest clutter trap and was never used for cooking. The bottom of the cabinet is nice and wide and holds all our large appliances including the (plugged in and ready to use) microwave so its out of sight completely.

img_1377 
The upper section is where we keep our glassware and pantry items.


For the island I found two sideboards that matched our bathroom vanities and came to the exact right height for kitchen cabinets. We placed them back to back and installed a huge slab of carrera marble on top. I’ve always wanted a marble island for rolling out dough!


Our contractor added power to each side so whenever we use appliances we just pull them from the hutch and stick them on the island. It’s a one pivot operation and the appliances stay out of sight when not in use. We purchased these spice racks from IKEA and stained them black to mount to the side to hold cookbooks.


For the built in section we went with Kraftmaid cabinets in a coordinating black antique finish. We ordered them from a company in Kentucky that offered wholesale pricing. I sent our floor plan and dimensions and worked with a kitchen designer to set up the right configuration.  We went with a large pantry cabinet:

and stainless farm sink:

with deep drawers and spice pantry pulls on either side of the range:img_1371

 The original thought was to do a different countertop on the built in section but once we saw the marble in our kitchen we loved it so much we immediately ordered a second slab from the same batch.

Now a word about the marble as that’s one area I didn’t fully understand regarding options. We wound up with a high gloss polished finish which originally looked like a mirror but now tells the story of our lives right on the surface. At first I was on hyper alert about scratches and water marks and had coasters everywhere however, that proved to be futile very quickly. Now we just go with it and it’s stopped bothering me (really, I never repeatedly and obsessively polish and clean the counters to try to get them shiny again… ever!). The counters have become etched from use and I rarely notice it. It’s sort of like streaky windows, you only see the streaks at sunset when the light hits it at the right angle (or you have company over). At some point in time though I will get the fabricator back to hone the counters and do a matte finish which is what we should have done from square one. Every time I walk into the kitchen and see that gorgeous marble though I smile! Side story: Dan and I met at Il Fornaio in Palo Alto, I was a hostess and he had been a bar tender there previously so was in visiting. There’s (matte) marble EVERYWHERE there, and it all gets used and abused and continues to look better with age. So the marble also brings us back to our early courting days, aw!

We found a black Viking range for sale from a culinary school that was closing. It had barely been turned on as it was part of an un-utilized  demo kitchen item so was in perfect shape and quite the bargain. It’s a residential range so properly insulated (unlike the commercial 1973 Wolfe range that was here before which and was leaking propane and nearly burned the house down).

img_1373-1 
The refrigerator is a sub zero which we got as a floor model. It’s very industrial with all stainless drawers inside and I love the glass door. It does make you keep your fridge clean but that’s a good goal anyhow.

You can actually store, marinate and cook meat in these drawers!

IMG_1426

The farm sink in stainless is fabulous as it has a hint of rustic style yet feels like a restaurant too which is exactly the look we were going for. The pull down faucet is commercial and fantastic for rinsing everything.

We keep the essential appliances that we use daily out which for us are the espresso machine and toaster. We have a couple cutting boards for work areas and like to do a seasonal display on the island (currently our bonsai tree which can’t be outside in the frost). The plates and utensils are out in racks for easy access. Behind the sink we have an antique French bottle rack on display and two Bookers Bourbon crates hold the soaps and brushes.

The real workhorse is the island and we all love having a huge one now!

Here are some before and after shots because those are always fun:

BEFORE: rustic

Screenshot 2016-01-15 17.59.19

AFTER: polished

img_0115

BEFORE: dated

Screenshot 2016-01-15 17.58.26

AFTER: fresh!

img_1384

BEFORE: dangerous uninsulated leaking propane and inoperable range

Screenshot 2016-01-15 17.59.03

AFTER: lovely safe and working range!

img_1367

Master Bedroom Renovation

Master Bedroom Renovation

I’m going to do a series of posts on our home renovations. We’ve owned four different homes and done a lot of work on all of them. The first three we fixed and flipped which enabled us to keep moving up. When we bought our current home our family was growing and decided to stay put and raise our kids. In the beginning it was all DIY and now we do some jobs and hire some out. We do all the design work though.

First project to post: Master Bedroom

We purchased this country home in 2004 from a builder who was an avid hunter and homesteader. While it was very impressive and full of rustic materials it was lacking in a few creature comforts some of us less rugged types are accustomed to (dishwasher, central heat). One such feature was a master suite. Our bedroom was upstairs with two other bedrooms and all three shared a bathroom. Downstairs was a large office, full bathroom and laundry room/pantry. Initially we were fine with that layout since we just had Zach who was a toddler and one on the way. Keeping the kids close was natural and sharing a bathroom wasn’t relevant as we were still in the diaper stages. Eventually though when we had a teen, tween, preschooler and a fourth one on the way I became pretty adamant about having a sanctuary all our own. We evaluated all the options. Go up, down, out, over, add a prefabricated addition, put up a yurt and build a tunnel to it, find an old church or barn to reconstruct in our driveway…. Seriously we were extensive. I downloaded some floor plan apps and utilized my pregnancy induced insomnia time to pour over houzz, Pinterest and the www and apply the ideas to our floor plan. One day looking over the current layout for the millionth time it clicked. Why are we using ALL this space for an office, guest bath and pantry and cramming everyone into one level upstairs??? All we need for a guest bath is a half bathroom. I started knocking down the walls on my floor planning app and what was left was a huge space that was poorly utilized currently and just right for our master bedroom! It’s funny how the answers are staring you straight in the face sometimes.

Zach took over our room, Scarlet took over his room and Frankie who had been in with us moved into Scarlet’s old room so the kids are all upstairs. Alexis is now sharing a room with Frankie (at least her things are).

We moved all our pantry items into a sideboard in the kitchen which made baking much simpler. We relocated the laundry area to another under utilized space, the landing upstairs. This made perfect sense as it’s the central area between all the kid’s rooms so the epicenter of dirty laundry.

img_0221
The rolling carts separate lights and darks and roll right up to the washer for easy loading. The stainless table is mounted to the railing on a hinge so can fold flush, and hanging clothes dry on wooden hangers on the valet hook above.

The pull out shelves hold milk crates for easy storing. One per child, one for towels and one for outgrown clothes to store, pass on or donate. It’s based loosely off the family closet idea. It’s basically a holding station so I can fold right out of the dryer (either on the folding table or in the air) and sort directly into the milk crates. When they are full it’s time to send them to their respective owner for unloading into their closet. It’s a great system!

This opened up room for a walk in closet, open concept master bedroom and bathroom. Once we had the space allocated it came down to design and layout. Having travelled a lot I based the flow off a well designed hotel room. It was our sanctuary so not necessary to close off the bathroom (although the space is there if someone wanted to add a wall someday). When we bought our first house my parents gave us an amazing anniversary edition red  Kohler claw foot bath tub that has travelled with us to every home but never quite fit. Finally it had a place to take center stage. I placed it by the window so you could see the view, fireplace and television while soaking. We ordered a shower conversion so that bathing or showering would be an option.


There is a bump out where the tiny half bath sits on the other side of the hallway and this was designed to exactly fit a double vanity which we purchased from Restoration Hardware. All the lighting and medicine cabinets came from there as well.


The toilet is in the corner behind the tub. We debated walling it off but chose to divide it with a tall open book shelf. This serves two purposes, to create a screen and to hold towels and toiletries. A wall could always be added here someday.  

 At the end of the bathroom there is an open doorway to the walk in closet. It has a his and hers side set up with an easy closet solution. My husband has a “thing” for shoes and sweaters I know. We are working on it, it could be worse!  

For the bedroom side we used the existing bookshelves to house the television and left the gun safe as is. The open wall holds a King sized bed perfectly. I have some wall mount shelves waiting to be installed (on the honey do list) directly on the bed frame for water glasses, remotes etc.

  
The tiny hall guest bath is one of our favorite rooms. It’s so quaint! It was a little tricky finding a sink to fit and we went through a couple trials before finding this sliding barn door but it turned out great in the end!


We finished with the rooms JUST in time for Alexis’s birth and it made me a happy mama to have this beautiful space to nest in. It’s not exactly the adult sanctuary I had imagined since the kids love it as much as we do. Taking a bath in the big tub by the fireplace with cartoons (or cooking shows for Scarlet) is tough to beat.


But we don’t mind sharing our space, most of the time. And keeping in the theme of hotels I have these great signs given to me by Dan for when we do!


2015, in review

2015, in review

As we begin 2016, and I was in blogger hiatus for part of 2015 (and most of 2014…) I feel a review is in order. Our first full year as a family of six and everybody is doing well. It’s always entertaining around here!

FAMILY

Zachary Stephen, 14
p1793948462-o555321338-6
Zach has become an AVID mountain biking enthusiast. He spends all his waking (and probably dreaming) hours either riding bikes, building trails and jumps or reading about bikes. We are so happy to have him interested in an outdoor sport that utilizes the nature around us as we live on 40 acres with dirt roads and fire trails. We are looking into some competitive biking groups for him and he is planning to start a team at Carmel High next year. He is in the eighth grade at Carmel Middle School and making a name for himself there. He placed second in the GeoBee (like the spelling bee but geography) and will go to the final round in January. He also got second place at the school science fair for physics. His granddaddy (who was a renowned cryogenic physicist) would be so proud!

Scarlet Rose, 11

p1877356361-o555321338-6
For the most part 2015 is going to be remembered as the year of Complex Regional Pain Syndrome (CRPS) for Scarlet. At the beginning of the year she was in a cast for her plantar fasciitis. Little did we know then what was in store for us with that injury. She was diagnosed with CRPS in the middle of January, 2015 and now in January of 2016 we are still frequenting Stanford for treatments. Not that it held her back too much. We raced back from our first appointment at the Stanford Pediatric Pain Clinic in the rain and Friday Bay Area traffic so she could rock it at the school talent show. The whole room clapped along as she sang Miranda Lambert’s “Mamas Broken Heart”. How she was able to sing like that in those cowgirl boots knowing now what pain she was in is beyond me. Singing has turned out to be a great release of pain for her. According to her pain psychologist, Dr. Griffin and the gate theory, her brain sends pleasure signals versus pain signals when she sings. Needless to say there’s lots of singing in our house at all times, things could be worse! In addition to all of that she started middle school and is very much in her element there with lockers, changing classes and of course fashion. She’s part of the school chorus so gets to sing every day at school.

Frances Willow, 4

p1694027822-o555321338-6
Frankie is in her last year of preschool at St. Dunstan’s. She is pretty popular there as she already has five husbands lined up. She says she would also like to marry Bobby Flay. She is a source of constant energy and entertainment. Zach has been keeping a list of funny things she says. He calls them “Frankisms”. It’s sure to be a bestseller one day. Here are a few highlights:

(Q) Why does the ice cream cone climb up the tree, if it’s the wrong tree? (A) Because he took the wrong path.

(Looking at the sun through the clouds) look at that small tiny moon that’s bringing light to us.

(On Thanksgiving) I’m thankful for God and the food and the beautiful world and stuffed animals and the trees.

Oh that Frankie!!

Alexis Paige, 1

p1695100611-o555321338-6
This year has been a big year of growth for little Alex. She started the year as a tiny baby and ended it a walking giggling budding toddler. She loves all her people and pets and gives us the most precious toothy drooly smiles. She wakes up as happy as can be and loves to snuggle. She really is a mellow sweet soul. She’s done so well with all the traveling and transitions she’s accompanied us through. As long as she has her people all is well. That’s a pretty great way to be! Her favorite word is uh oh, as she repeatedly drops things for us to retrieve. She also says Mama, Dada, more and Bo Bo (which means brother).

CHARITY

The first part of the year was also busy with charity work. I was on the board of Voices For Children, CASA of Monterey County, and co-chair of our annual gala for the second year. Our theme was Mad Hatters Ball and much of the peninsula turned out in black tie and mad hat to raise money for the foster youth. It was a great success! But it was a LOT of work and something I found I didn’t have time for any longer with a baby and all the traveling to Stanford. Someday I’ll get back to charity work!


img_0796

HOME RENOVATIONS

We completed a master bedroom remodel just in time for Alexis’s birth in September 2014 and finished off some final details for that plus a new kitchen in 2015! I’ve always loved cooking and pulled off some pretty impressive meals (if I do say so myself) in some very underwhelming kitchens over the years. When we moved here, our home came with a commercial Wolf range circa 1973 that nearly burned our house down because it wasn’t insulated and sitting directly next to our wood walls. For several years I used a countertop oven. It would only hold a quarter sheet pan so you can imagine how long a big batch of cookies would take to make. It’s very exciting to have a kitchen fit for a cook and designed by us to fit our family perfectly!! I’m working on a post with all the details but here’s a sneak peak.

  
And thanks to a flooded cellar we finally took the time to seal and panel this little room that is built into the hillside on our property. It is now a craft room so we have a space for all the little artsy bits. And messy projects stay contained in one space (away from the house). The kids can create til their hearts are content! Glitter and sticky glue everywhere = no problem! Here the girls decided to show their appreciation with a date night for mom and dad. They brought us appetizers, dinner and dessert and even made a playlist of our favorite songs! Awwww😍😘

img_1373

TRAVEL

We didn’t get a lot of vacations in due to Scarlet’s intense treatment schedules but we did manage to get to Alisal Ranch for a quick round up. We have so many fond memories from our multiple trips there and will continue to go as often as we can. The perfect family get away!

img_0632

img_0634img_0690

We also made it to North Star for a late snowboarding trip. Scarlet couldn’t board so Zach brought a friend. They had one great day and then Zach fell and broke his arm on his first run with a new snowboard. His second broken arm in a year (first one was from falling off his bike)! Guess this was also the year of medical bills!

img_0991
img_0955_2

Zach also had a special trip on his own with a friend Christian, who’s dad owns an amazing lodge in Alaska. Zach flew (partly alone) to Juneau  and took a float plane to a remote island to join Christian and his dad at the Favorite Bay Lodge. He brought back 75lbs of halibut!! We’re still cooking fish!

Dan got to travel to some exotic locations installing magnetometers for our business. He was in China, Norway (twice), and Switzerland. I wish we could have joined him but this was not the year for family international travels. We do have some great Dale of Norway sweaters that he brought back however!

THE HOMESTEAD

For my birthday Dan and the kids surprised me with a carrot cake (my favorite), thick filets (yum), champagne, a new cat (we couldn’t agree on one name so we call him Tom Peter Bruce) AND my very first car! They tracked down my 1966 Volvo 122s that I bought with my dad when I was 16. I was feeling nostalgic one day and a little teary over letting it go since I’ve lost my dad to cancer and we had such great memories working on it together. Well, careful what you wish for because that baby blue beauty is back! And in need of major repairs! I’m not sure I remember all the auto shop skills my dad taught me but it will be rewarding to get the car back in tip top shape so I can share it with our kids.

img_0826
img_0831

We started a little farm, (or maybe homestead would be a more applicable term). We went trough a few trials but have a happy flock of ducks and chickens now in the poultry mansion.

For the chickens we have two Easter Eggers, Amanda & Hosephina, two Buff Orpingtons, Henrietta and Crazy Mabel, two Rhode Island Reds, Penelope and Emma and two Black Sexlinks, Fluttershy and Cleo. We also have a male Welsh Harlequin duck named Mr. Drake and two female Pekin ducks, Beatrix Potter and Jemima  Puddleduck. We have four Copper Marans coming in spring and will probably add a Rooster soon.

They provide constant entertainment and soon hopefully will give us a Mother Lode of eggs.


Next project is gardening. We have eight bare root hybrid tea roses from Griggs Nursery to plant. We’ve inherited several rose gardens with houses but never planted our own. The roses that came with this home had to come out when we did our remodel. I absolutely love roses (Scarlet’s middle name in fact) and making arrangements from roses and can not wait for these beauties to bloom. We also have some climbing roses coming to go on the rock walls. It will be a countryside paradise here come spring. We also hope to get some veggies growing. We have a small fall crop going on our green house now and look forward to expanding on that in the spring and living off the land.

2016 promises to be another adventure! We are busy as ever at our business so there will be lots of traveling ahead. Hopefully we can make some of the installations family trips. Best wishes to all for a happy new year and thank you if you read this entire thing! It’s fun to jot down all of these memories, I hope they are fun to read as well.

Keaton Family Christmas, 2015

Keaton Family Christmas, 2015

Merriest of Christmases to all! We had a lovely and eventful holiday as always. 

 Our Christmas really started on Christmas Eve Eve when we went caroling with friends. I had never gone before but we have friends that live in a great neighborhood for doing neighborly things such as this so we gave it a shot this year. The idea stemmed from a make up trick or treating session we did for Frankie after she missed Halloween due to the flu. We planted candy at a few homes and Frankie and friends trick or treated a week after Halloween. Everyone was SO nice!   
We decided we should bless them with Christmas carols this holiday season. We formed a group and met up at my friend Lisa’s beautiful home for lasagna. Scarlet printed up lyrics to five different carols, we wore festive Santa hats and had candy canes to hand out. After dinner and some vocal warm ups from our middle school chorus students we headed out with hot cider in our travel mugs (plus brandy for the adults who wished it). We were about 20 strong with a huge age range. Apart from the trained chorus students we weren’t in tune or even in sync at all times but the faces of the neighbors were priceless! They seemed truly touched! Some of them had tears of joy, others wanted to give us hugs. Many said they had never had carolers sing to them before. It was one of the most rewarding holiday experiences I have had the privilege of partaking in and all of us agreed this needs to be an annual event. 
   
What a great kick off to Christmas! 

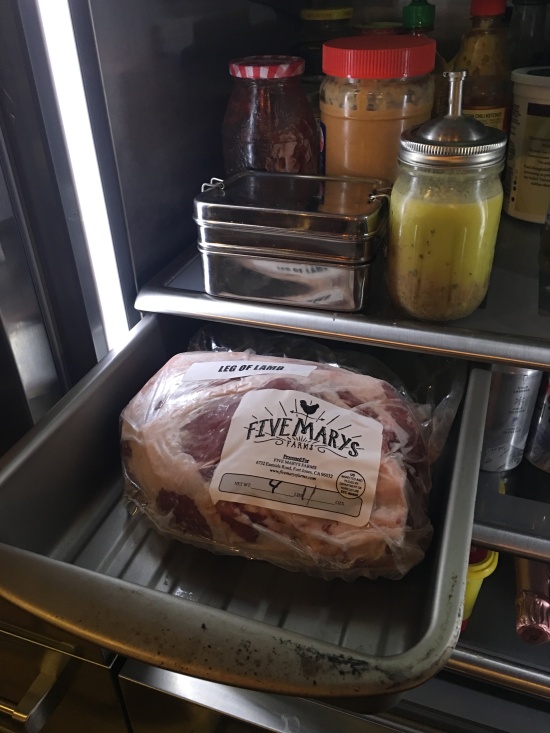
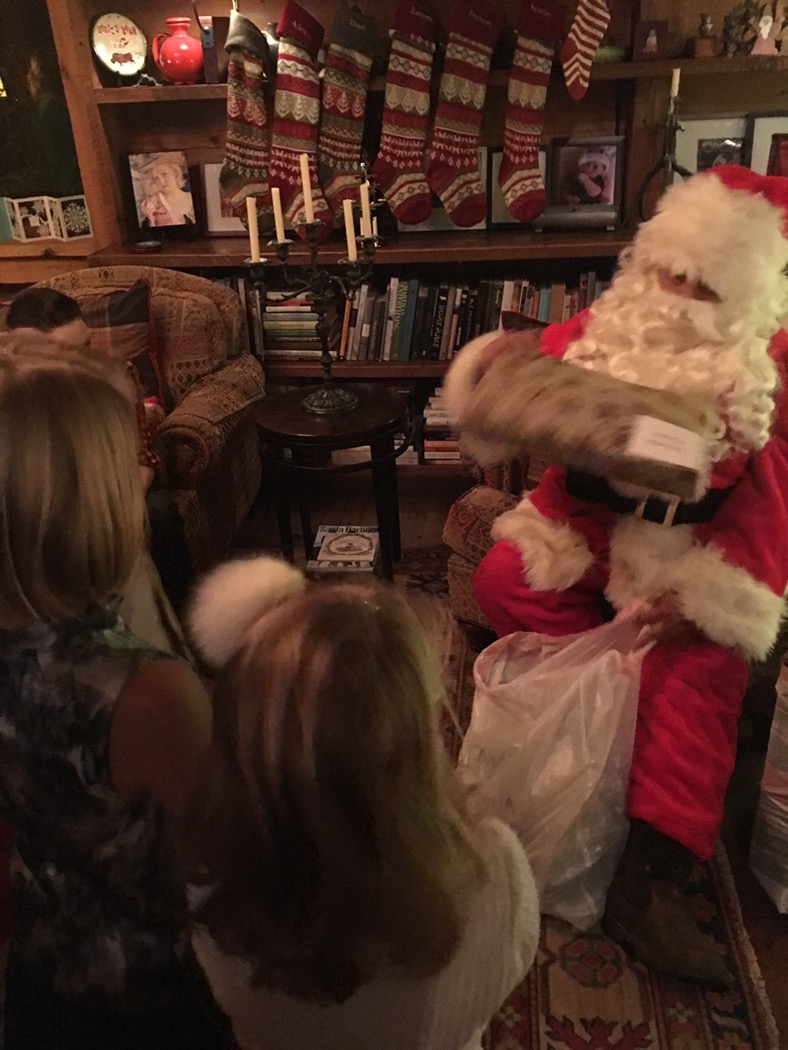
Christmas Eve we hosted a group of friends and family at our home. We live in the middle of nowhere and have an amazing local volunteer fire service that delivers gifts to homes on a fire truck on Christmas Eve. Complete with Santa and sirens! The kids go crazy, it’s so fun!! So the party is HERE for Christmas Eve. We made a hickory smoked ham and a sirloin tip roast, both from Five Marys Farms

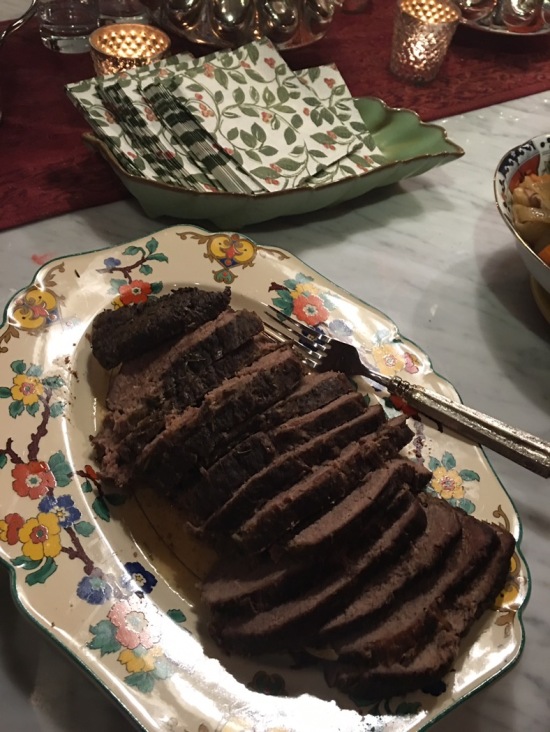
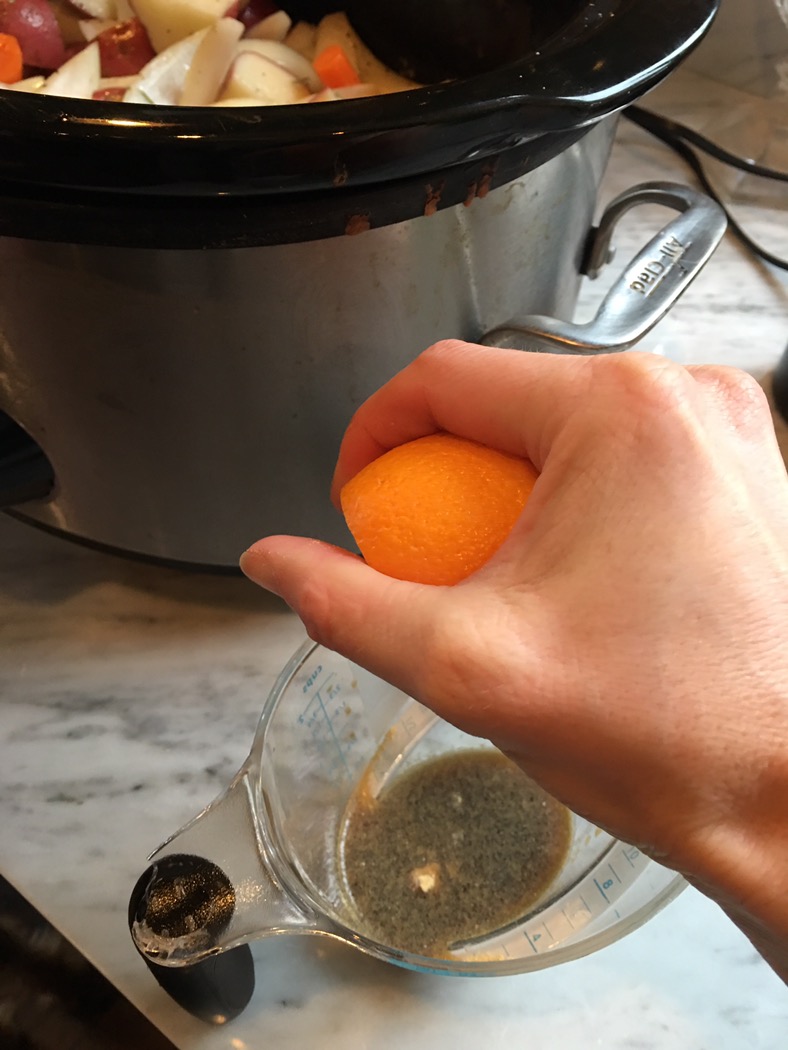
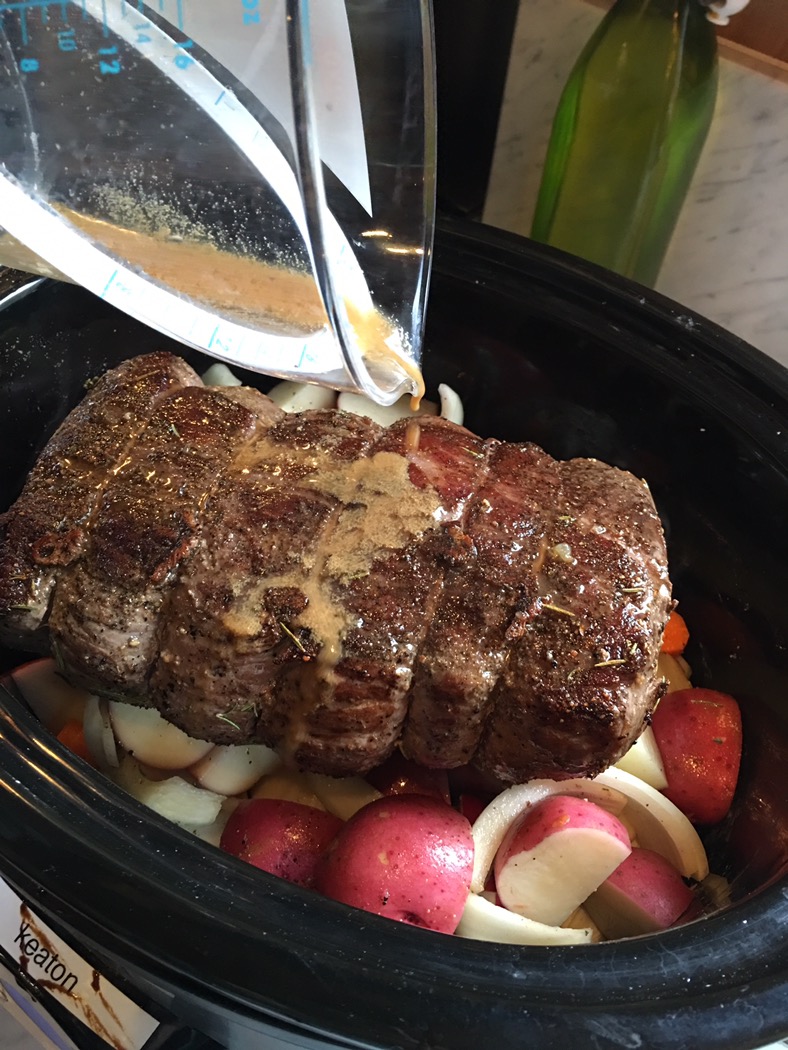
The roast came with our farm box and was already tied. I decided to slow cook it over potatoes, onions and carrots. I tempered the roast for an hour to bring it to room temperature, coated it with salt paper and rosemary and seared it in a smoking hot cast iron skillet with olive oil for 3 minutes per side. Then placed it in the slow cooker over quartered red potatoes, sliced onions and carrots. I made an acidic sauce to pour over the roast and help break down the tissue and tenderize the meat while cooking. It had apple cider vinegar, Worchestershire sauce, dry mustard and orange juice. Set to cook on low for 8 hours. 


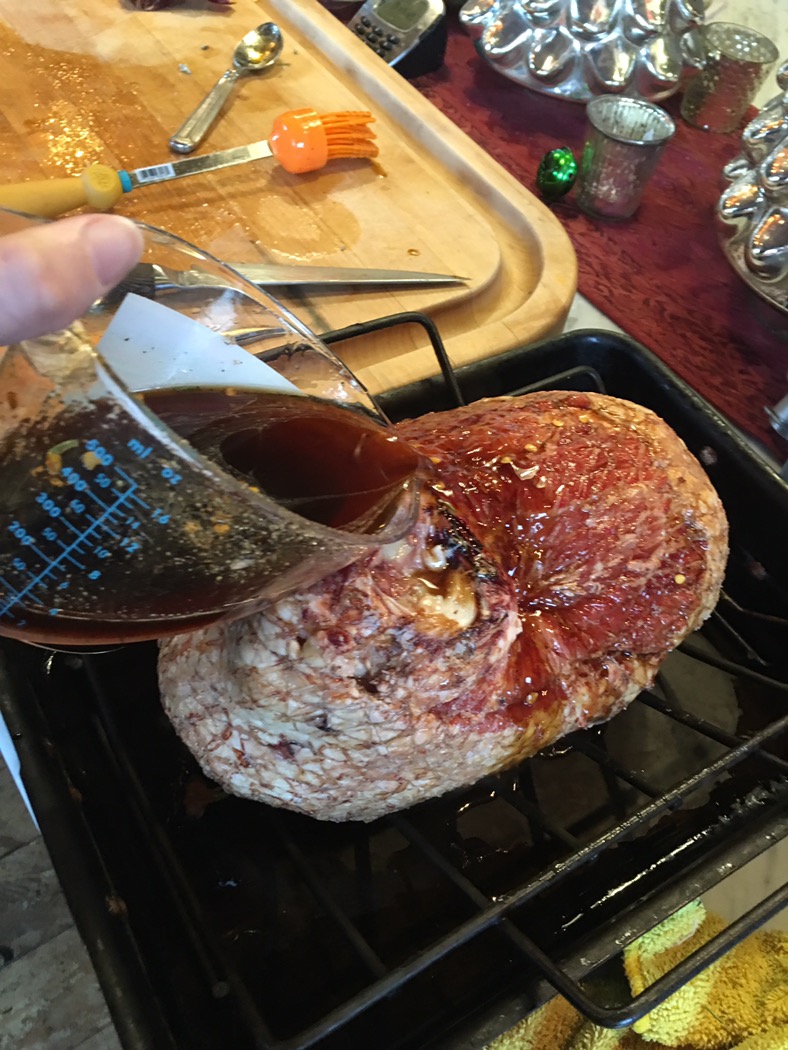
The ham was from one of Five Marys Gloucester Old Spot pigs and had a rich flavor and dark color. I made a glaze of bourbon, honey (also from Five Marys), molasses, chili pepper flakes, and pepper. I scored the ham with a cross hatch pattern, placed it in a rack on a roasting pan and poured the glaze over the outside. 


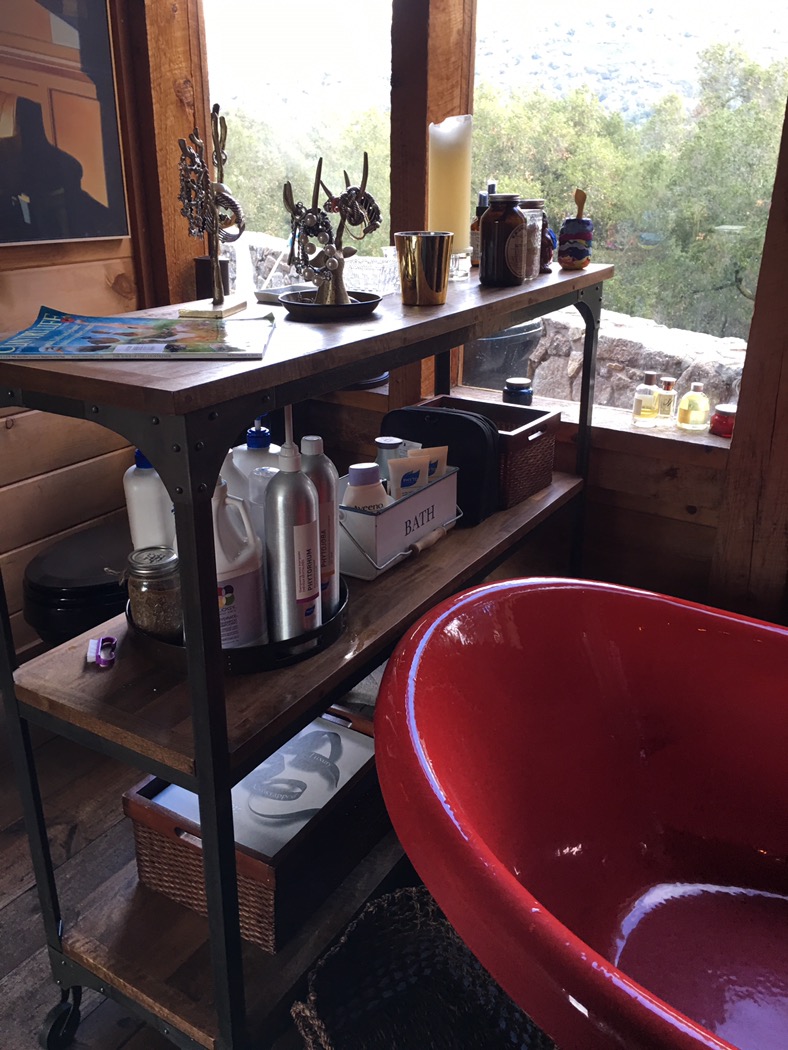
Then added water to the roasting pan and baked it at 350 degrees basting every 20 minutes until the internal temperature reached 135 degrees which only took about an hour. I couldn’t find my baster (I think it melted last time I used it) so had to improvise with this (clean) baby Tylenol dispenser. It did the job but took an extra long time so I think a trip to Williams Sonoma is in order soon!


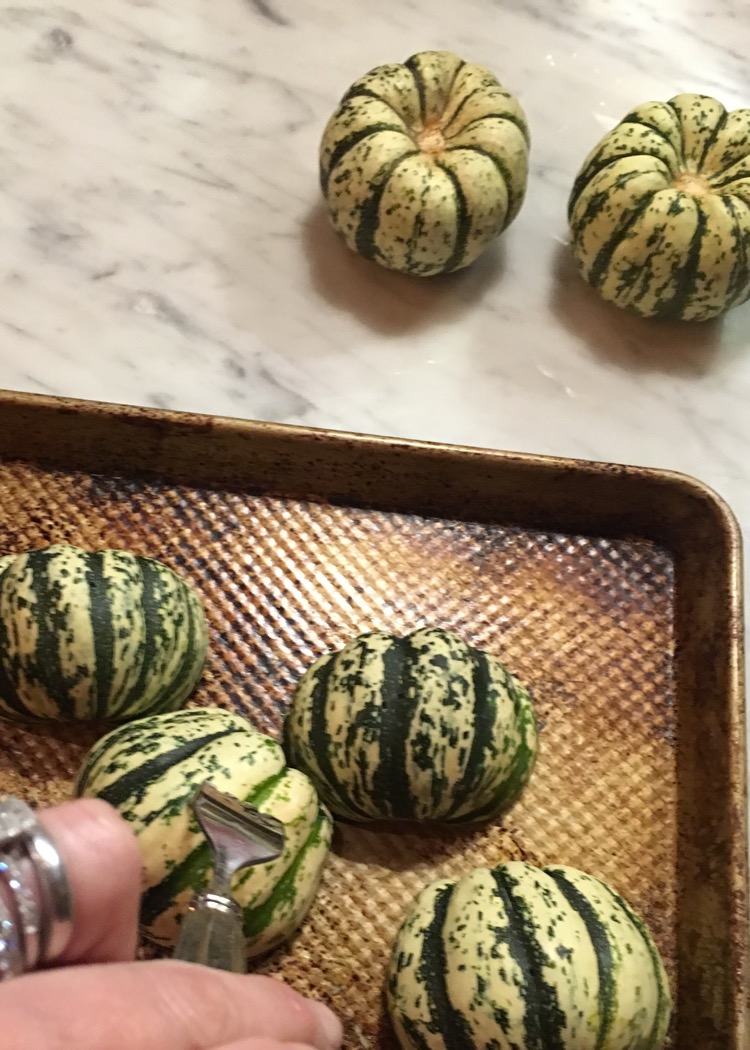
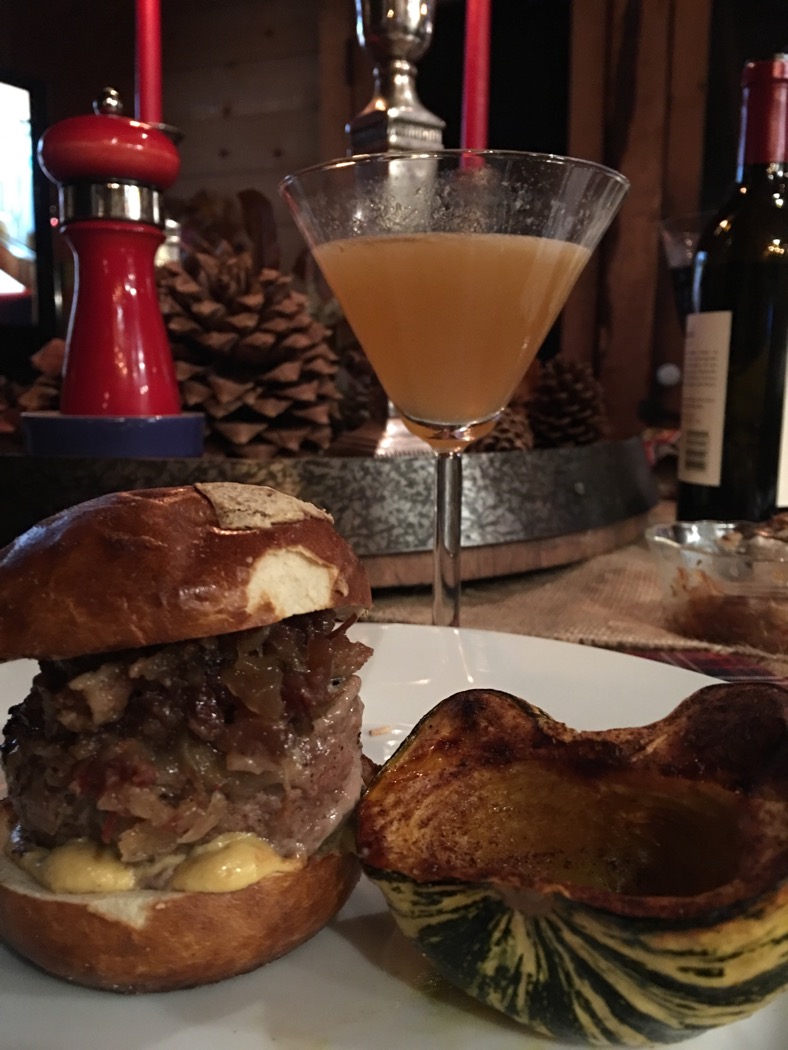
In addition to the meats I made a gingerbread cheesecake, a huge batch of sidecar cocktails, roasted butternut squash, and cooked cabbage. Our friends brought manicotti, appetizers, cherry and pecan pies plus cookies. 

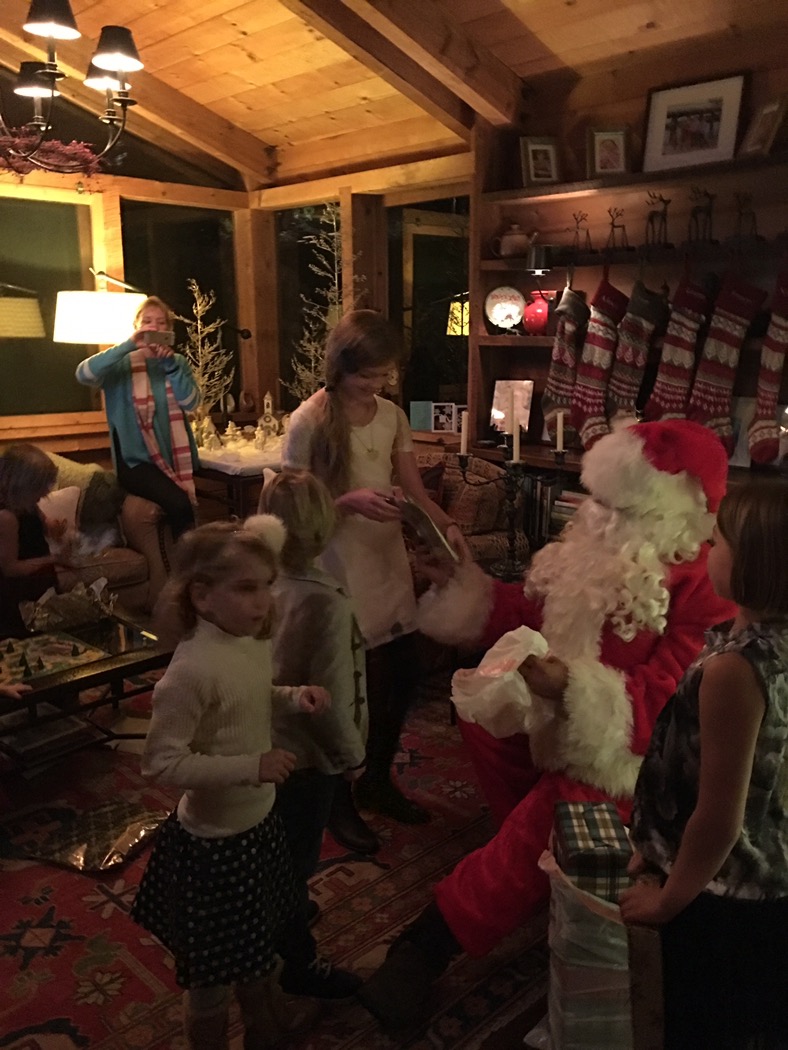
Santa came on the firetruck with sirens blaring, every child got a present and immediately began playing with toys and changing into new jammies.   


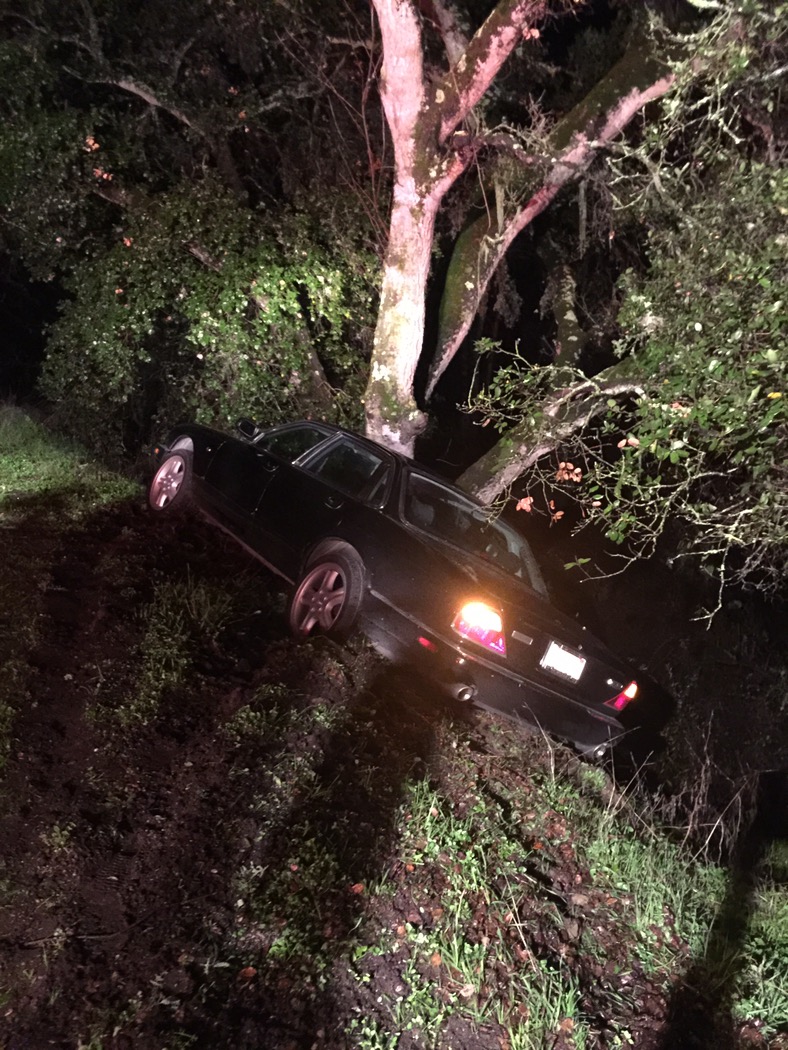
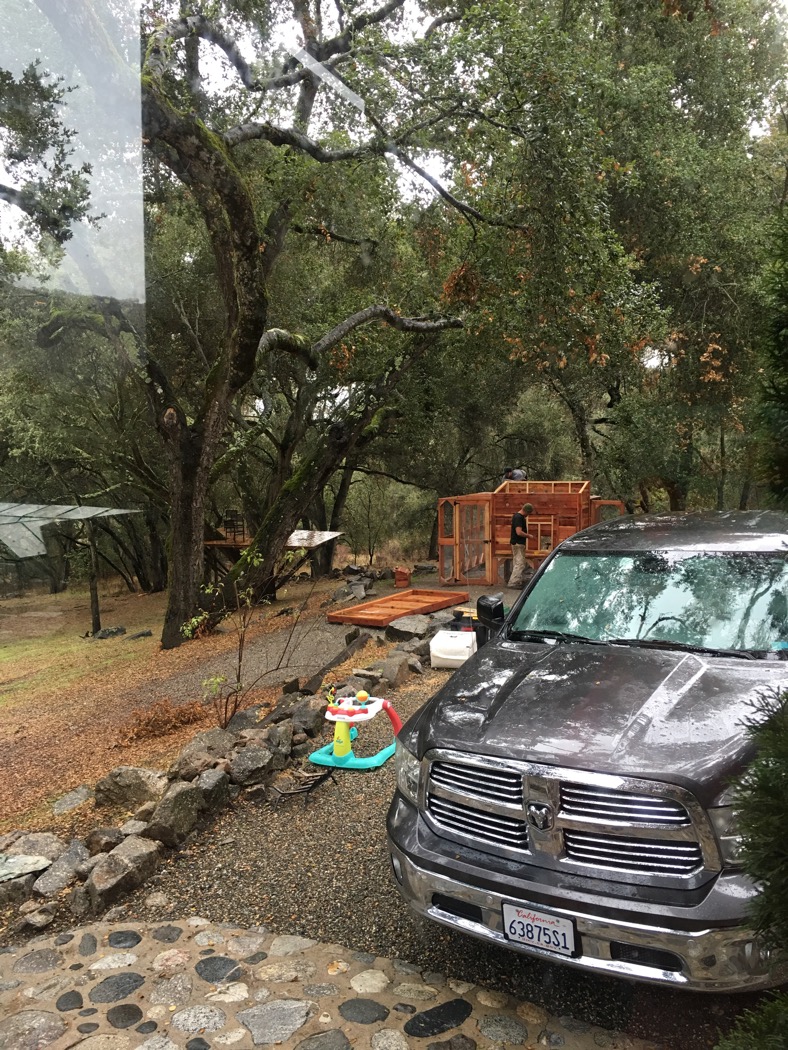
After Santa left, dinner was ready, appetizers and cocktails were consumed. But Dan’s parents were late. They had to take a detour to pick up baby Alex’s Christmas present which had been forgotten at work. Still they were very late… We got a text “we wrecked the car, call for help. We are alright but can’t get out”.  Well turns out they spun out on a corner in the rain and thankfully a tree kept them from going over a cliff! Dan drove down to wait for the tow tuck with them. It took two tow trucks to pull the car out! They are fine thankfully, and even drove the car out here. Just a couple dents. Thank god for that tree!!

  
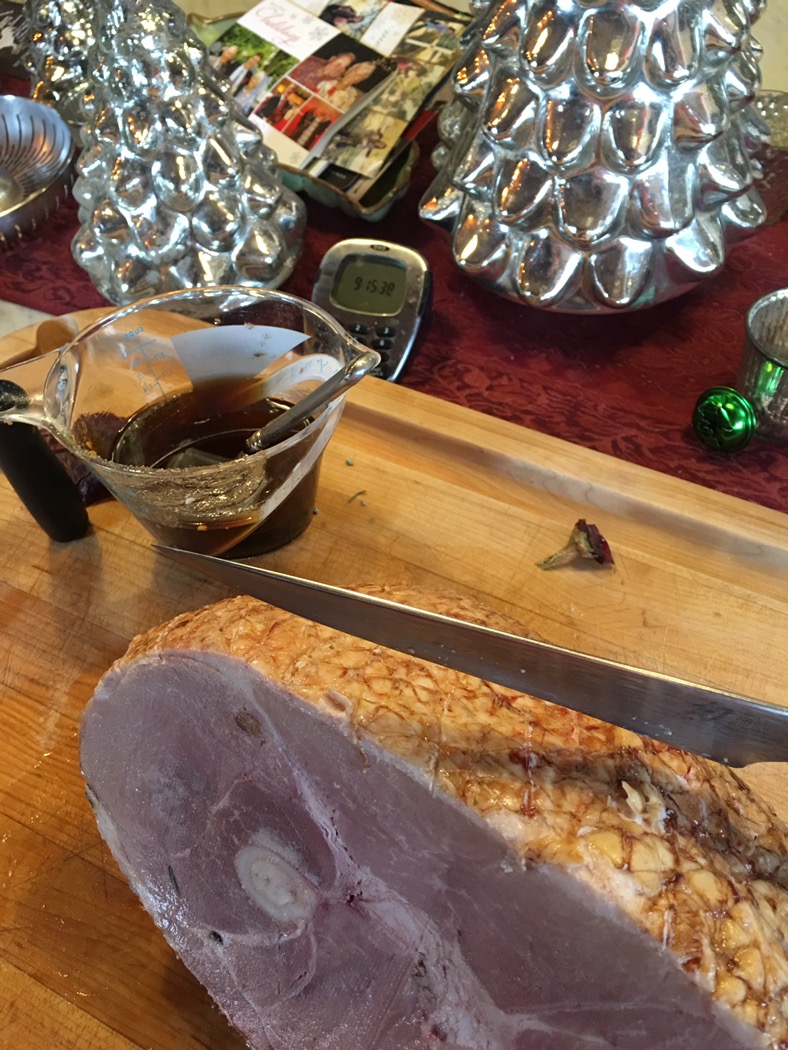
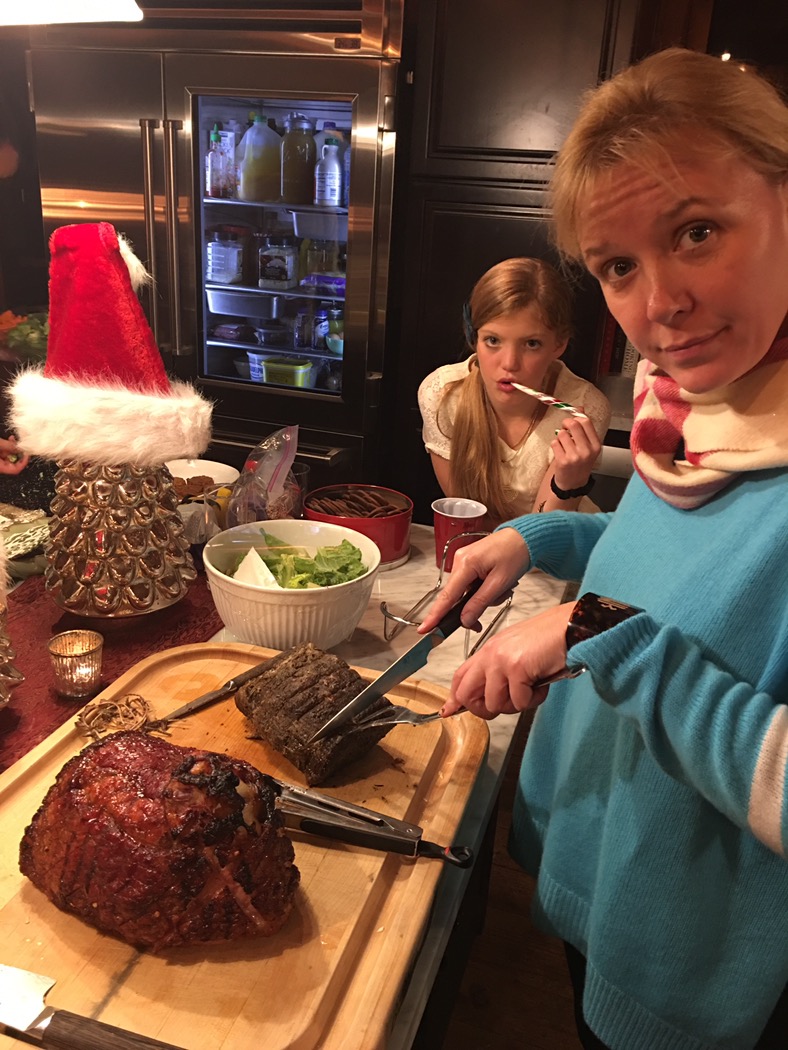
By the time we got everyone in one spot for dinner we were a couple hours past the planned serving time so the meat was a little over warmed. In hindsight I should have pulled it from the crock pot and warming oven sooner. I think I’m being overly critical though since everyone ate everything up. Served with the jus from the respective pans it really was delicious. The roast had great flavor and the ham was crisped on the outside with the cooked honey glaze, juicy and tender on the inside. The glaze had a tiny kick of spice from the pepper flakes which offset the sweet honey and bourbon flavors nicely. 

   
My friend Jeannette did the carving. She grew up on a farm and knows a thing or twenty about meat. She is the one who got us started with our poultry flock by giving us the ducks. 


 We feel so blessed to have great friends and family to spend the holidays with! After everyone had either left or gone to bed Dan and I poured some Christmas Armagnac and began cleaning and prepping for the morning. Stockings stuffed, cookies and broccoli “eaten” (we had cooked all our carrots with the roast so the reindeer got a special broccoli treat instead 👍🏻), note from Santa left and a few large presents brought in. It didn’t take too long. We were in bed by 1:00am which is pretty good for us on Christmas Eve.!  

  
‘Twas the night before Christmas… And all through the house, mom and dad were frantically stirring about getting Christmas ready! 🎅🏻🎄

Christmas morning I made our traditional Bisquick streusel coffee cake. We make it every year and the kids (and adults) love it! It couldn’t be simpler. I’ll put a link to the recipe below. 

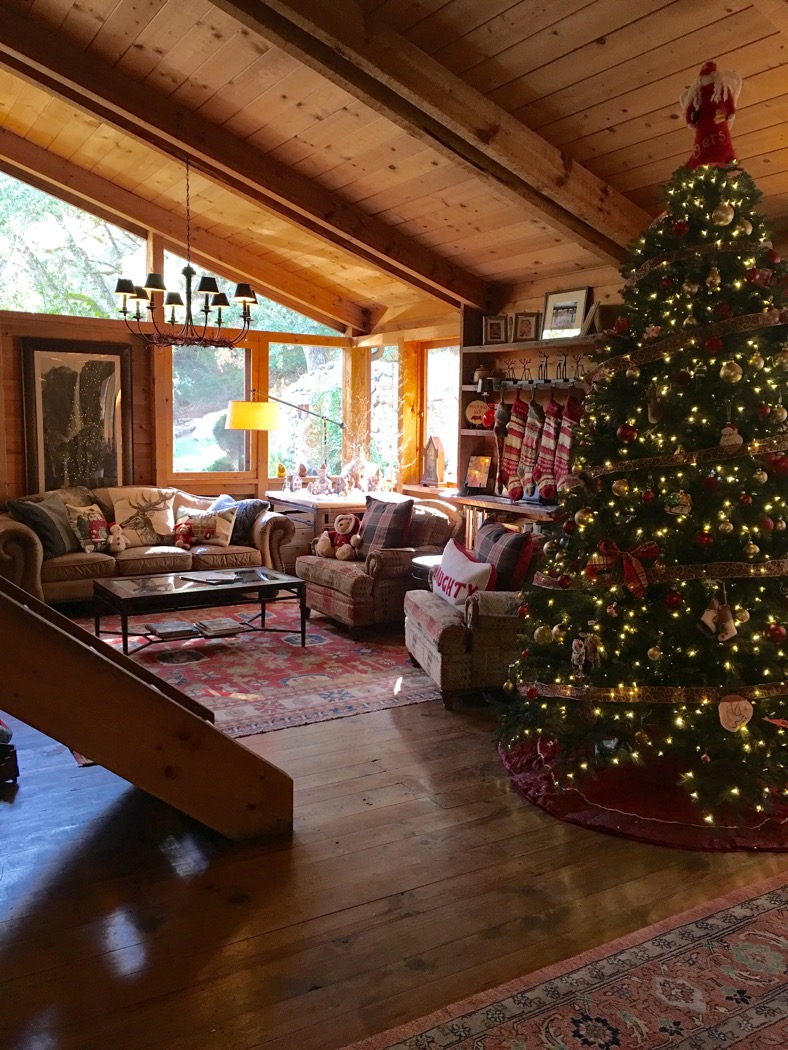
Once the house began to smell of coffe and coffee cake children and grandparents started appearing like in a Folgers ad. Some were VERY anxious to open presents. We headed in to the living room and got started. 

   
It’s always the empty box that entertains kids the most right?


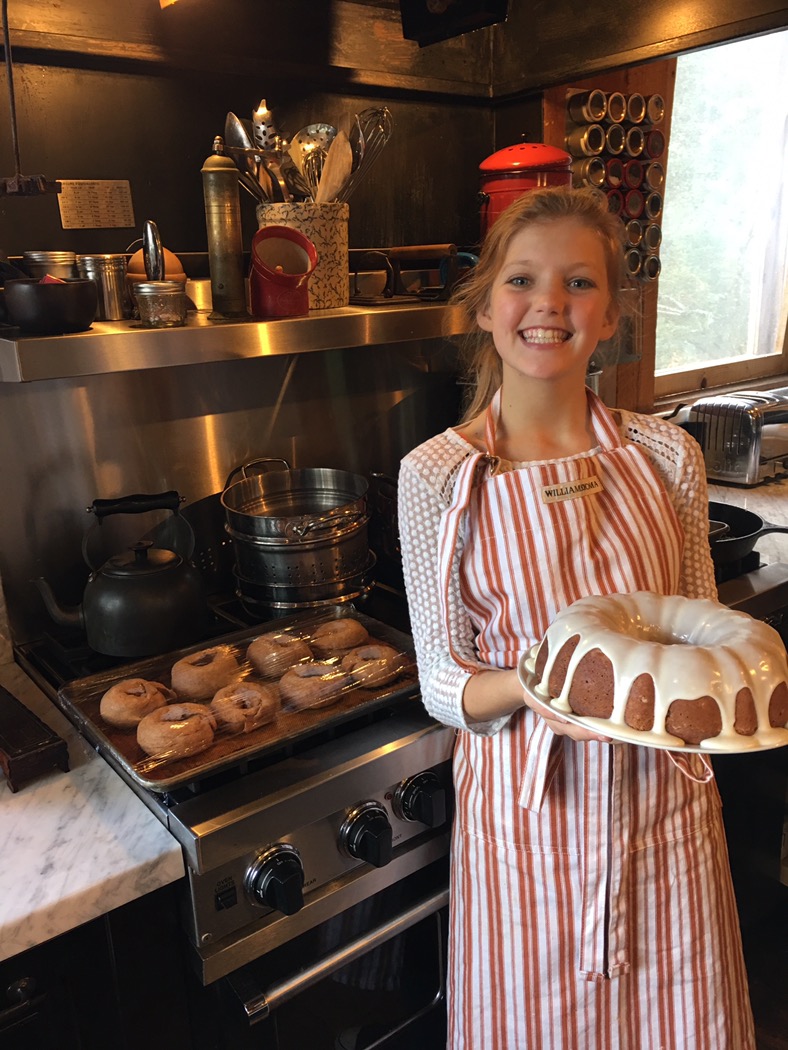
There’s no doubt in my mind this girl will be famous!    
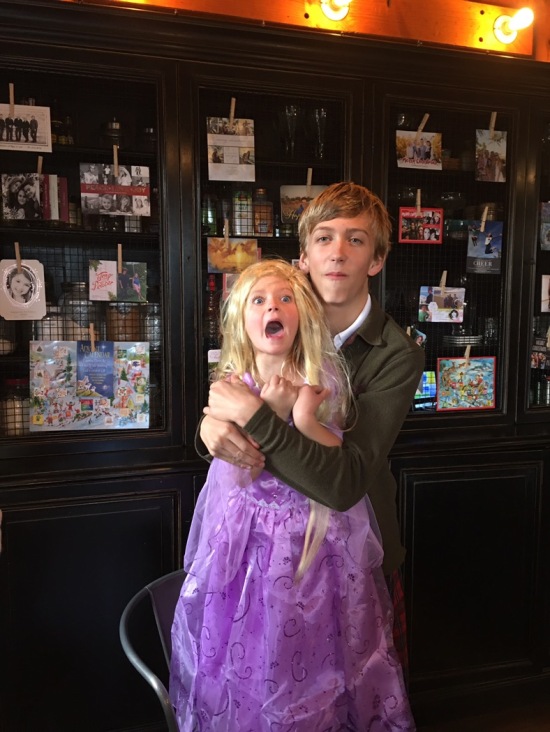
Frankie’s Santa gift was this Rapunzel costume and wig. Zach loves to hug her and sometimes she doesn’t love that…😝

 
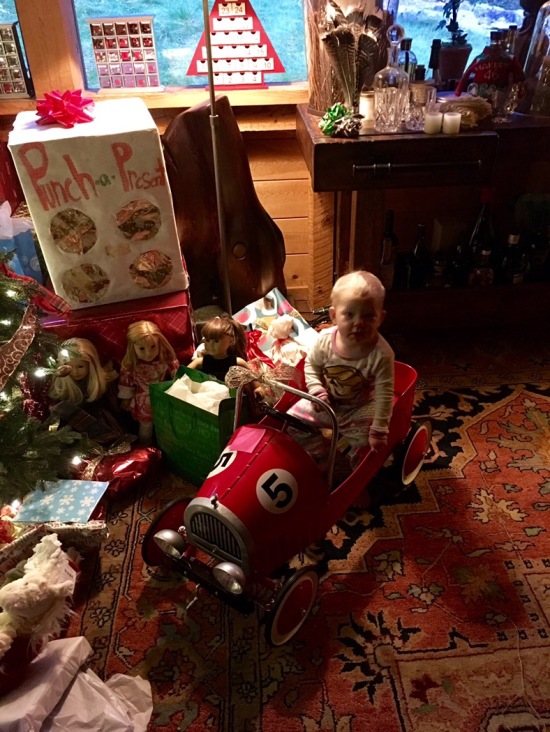
Alex’s big gift was this retro car. She ran right to it in the morning!
  
What could it be?

A living doll in the dollhouse!

Everybody had a great time. Zach got things for his mountain bike, Scarlet got a bunch of accessories for her room from the Junk Gypsy line at Pottery Barn Teen, Frankie and Alex got a huge doll house and furniture for their room. Dan got a new set of copper pots and pans (in theory anyhow, I ordered them in October and they still haven’t arrived…) and he surprised me with a gorgeous rooster weather vane!


Although it looked like a lot of boxes everything was for a specific purpose so I don’t feel like we added a lot of clutter into the house, which is always a huge fear of mine. I’ve found keeping little knick knacks to a minimum helps us tremendously with having the house tidy!

The present that was the most fun to open was this “punch a present” that Scarlet made for Zach. She cut four holes in a box and taped wrapping paper behind them so he could punch through the paper to get four different bags of treats! She’s pretty clever!! 👊🏻🎁

After presents Dan made his traditional hash brown casserole. We make it every year too. Cooked hash browns in a huge cast iron skillet topped with scrambled eggs and crispy bacon, and broiled with cheddar cheese and green onions. Yum!

The grandparents made their way home slowly after lunch and we cleaned up the mountain of boxes and wrapping paper. 

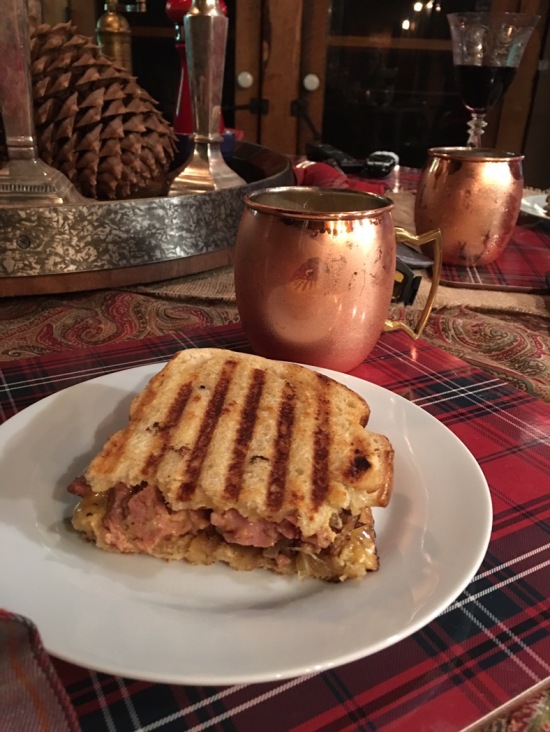
The leftovers were put to good use for dinner and my personal favorite: ham, cheddar and bacon marmalade panini! We watched some holiday movies and went to bed early. 


I think it’s time to go work some of this decadence off! I hope everyone had a fabulous holiday and is enjoying the break!!

From my family to yours!

p1662804880-o555321338-6
RECIPES:

Bourbon and Honey Glazed Ham: delicious ham, the glaze crisped up the outside during cooking. Our ham was 8lbs so cooked faster. 

Sirloin Roast: I cooked ours for 8 hours on low and then it sat in warm for 2-3 hours and it was a little dry. I would check it sooner next time. Delicious flavor though!

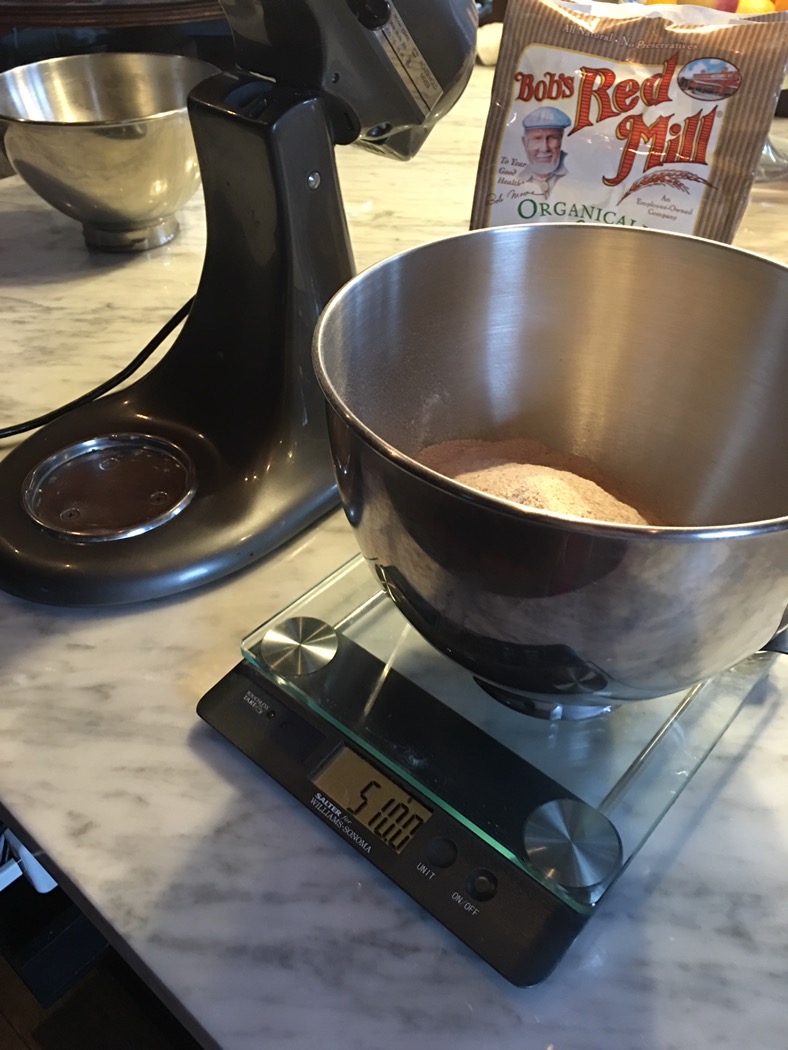
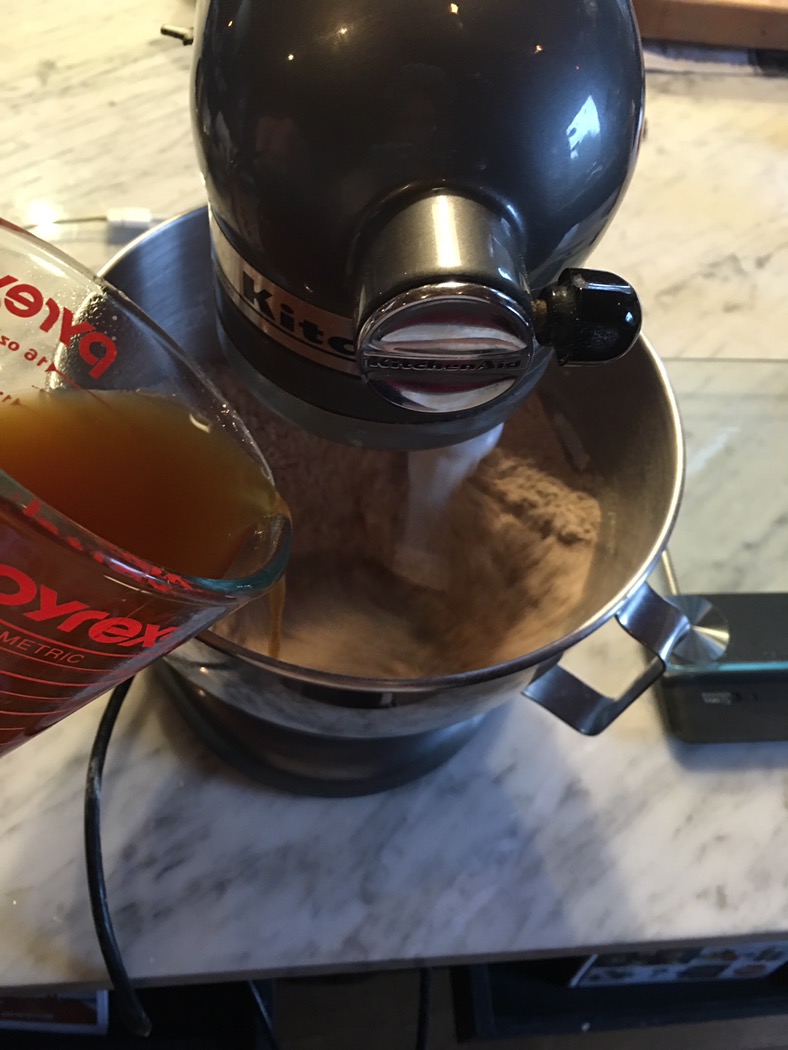
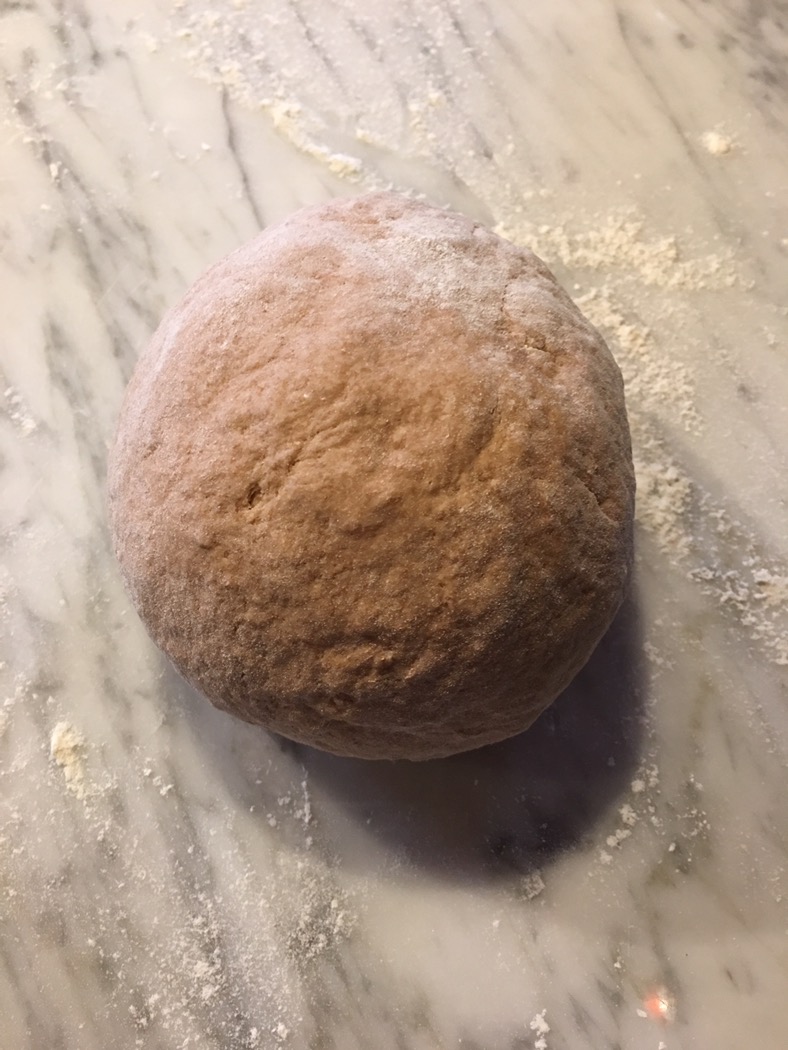
Gingerbread Cheesecake: this was devine! If you read the comments though many people say it needs to cook longer and I agree. I added 15 minutes to the cook time and still the center was a little soft. Next time I would add 20-25 minutes. I used ginger snap cookies for the crust but did make gingerbread men for the kids to decorate and place on on the cheesecake. 

Bisquick Coffee Cake: this used to be on the box (way back when I was a kid). It’s not anymore but thankfully it’s available online. I always make extra for snacking later. 

Leg of Lamb, WIN! Egg Fettuccini, FAIL… and Creme Brûlée

Leg of Lamb, WIN! Egg Fettuccini, FAIL… and Creme Brûlée

This post wasn’t going to happen because it wasn’t a full success… But how else can we learn? And the lamb (which was good) was very very good! But the egg fettuccini was horrid!

Dan’s brother Dave was visiting from Texas so he came out for dinner with their parents. We were pretty excited to be hosting a dinner party with all our Christmas decorations up. 


We had a beautiful leg of lamb from our Five Marys Farm box so built the menu around that. Looking through options online I came across a recipe for fettuccine with mint sauce to seve with lamb. It seemed like a perfect choice since Scarlet loves to make homemade pasta. It would be fun to be rolling and cutting pasta dough with everybody while the lamb was cooking. I found recipes for egg and spinach fettuccini online and headed to Whole Foods for all the ingredients. We decided to serve it with a simple salad and creme brûlée for dessert. 

On the day of I set up a big cheese platter and pulled the lamb out to temper for an hour. Dan trimmed the fell (tough layer of fat) from the meat and I pricked it all over with the point of a filet knife. Then made a rub of olive oil, mustard, chopped rosemary and garlic. I rubbed the lamb all over with the poultice being sure to work it into the knife pricks, seasoned it with salt and pepper and placed it in a roasting pan on a rack with the fat side up. Poured a cup of chicken broth in the bottom of the roasting pan and placed it in the preheated 425 degree oven for 20 minutes. Lowered the temperature to 325 degrees and rotated the pan to cook for another 55 minutes or until the internal temperature was 135 degrees. Turned the oven up to broil and crisped the outside for 5 minutes. The lamb was beautiful, crisp and smelled divine! Tented with foil and left to rest while we finished up dinner. 

  
The mint sauce consisted of sautéed frozen peas, mint leaves, yogurt, garlic, olive oil, salt and pepper. Blended until frothy and set aside waiting for the pasta!

IMG_0664-0
While the lamb was cooking Scarlet made the creme brûlée. She added 2 vanilla beans (sliced and scraped) to heavy cream and set it to come to a simmer on the stovetop. Then she separated out egg yolks and mixed in maple sugar to the yolk until it was light in color. Once the cream was simmering she turned off the heat and let the vanilla flavors macerate for 15 minutes in a covered pan. Removed the vanilla bean pods (rinsed and dried to add to our sugar jar) and slowly add the cream to the yolk mixture, whisking the whole time. Disperse evenly into ramekins placed in a roasting pan and add boiling water to cover half the sides of the ramekins. Place in a preheated 350 degree oven for 45 mins or until set and refrigerate until cool, about 2 hours.  

The pasta was supposed to be the fun and easy part since we had made homemade pasta several times successfully. This recipe was a little different though with the extra eggs. We made one batch of egg fettuccini dough and one batch of spinach fettuccini dough. All seemed to be going well until it reached the cutting stage. It wasn’t going through the cutter cleanly at all. It was sticking together and coming out in a huge mess. This was not exactly putting our dinner guests at ease and became quite the spectacle (adding somewhat to the pressure!). We tried rolling it again and flouring the dough before cutting but the results were the same. Sticky, gluey breaking noodles. We hand cut the rest of the noodles as best we could. At this point the lamb was done, the cheese platter was exhausted and our guests were looking hungry. We decided to try cooking the pasta to see how bad it really was. It definitely firmed up and did separated into noodles but once it was added to the mint sauce it just looked like a sticky gluey mess. Scarlet was devasted, Dan was stressed, I was trying to come up with a plan B to save dinner. Just when all this was boiling to an epicenter of chaos baby Alex pulled up on a chair and fell back pulling the chair down over her. Screaming bloody murder, with a goose egg on her head and a purple swollen finger this became my new priority. 

  I sat down to nurse and comfort her, debating whether her finger was broken and needed emergency attention. She was bending it so it seemed like she would be alright. At that point I  asked Dan to just serve the dinner as it was. It wasn’t too late, only about 7:30pm, but I knew I wasn’t going to have two free hands again to do anything more to fix it. In the frenzy of the failed pasta we forgot about the salad so just skipped it. The mint sauce was made with peas, that counts as a veggie right? Dan carved the lamb which was perfect (cue the angels singing). Crispy and seasoned outside and beautifully pink and tender on the inside. He plated it over the pasta mess as the mint sauce was meant to go with the lamb. All seemed to be lost at this point so I didn’t even consider taking pictures but I wish I had. 

Here’s the inspiration recipe with lamb chops on the fettuccini and mint sauce. 

  
Let’s just say ours wasn’t quite as pretty… Picture a sticky green mess with a beautiful piece of lamb on top. 

Sitting down at our festive Christmas table with this somewhat mess of a dinner felt straight out of Christmas Vacation. Nobody seemed too excited to try it and the tension was high. However, once people did start eating the mood changed. The lamb was incredible, truly delicious. The mint sauce was a wonderful accompanying flavor and the pasta wasn’t quite as bad as it looked. Plates were cleaning up faster than we thought and the mood lightened as we all shared different stories of failed recipes. People went back for seconds (of the lamb). 

Soon it was time to (fingers crossed, Hail Mary) try the creme brûlée. We broke out the flame torches and set to work sprinkling sugar on them and torching the tops to get a good crackle. 

   
 This was another recipe we hadn’t tried before so apprehension was high…

It sure looked good! We served the creme brûlée and waited anxiously like contestants on Chopped. The sugar had melted perfectly and had a nice crackle, the creme inside was smooth and set, it was… DELICIOUS (hallelujah, HALLELUJAH, hall-e-lu-jah 💃👼🏼🏆)!!! 

 
Dan broke out his new birthday Lone Eagle Bourbon (a gift from Uncle Dave) and we passed around some of our Smokey Bacon Ginger Cookies (in case anybody was still hungry after our light dinner). The mood was happy, we had overcome a trial and it felt like Christmas with all the family there. 
Why does it always happen this way? On any given Tuesday night we could be making a gourmet meal that comes out perfectly yet on a Friday, with a crowd and plenty of time to prep we wind up in a frenzy. But rest ye not, egg fettuccini, we will be back to make you again. And we will succeed!!! I still haven’t figured out what we did wrong but we will not relax until that dish is mastered! Santa may just need to bring us a kitchenaid pasta attachment for Christmas to aid in our quest…🎅🏻❤️🍝

And baby Alex is fine. Her finger was badly bruised but doesn’t seem to bother her at all and hasn’t kept her from getting into more trouble. 15 months old now, tis the age of bumps and bruises!

  
We used the following recipes for this dinner, I’m sure there was some user error or unlearned skills that attributed to the pasta fail. Not to be blamed on these recipes. Of course you could always just buy the fettuccine too:

Roasted Leg of Lamb

Mint Sauce

Egg Fettuccini 

Spinach Fettuccini 

Creme Brûlée 

The Poultry Mansion

The Poultry Mansion

At long last we have our whole flock together in feathered harmony. No longer are we living in fear of the owl or going to the yard, craft room and playhouse to feed them all. The ducklings, now a month old have just moved in with Mr. Drake who is four months old and he is a proud and happy drake with a purpose again. No more moping about for him!

The chickens are two months old and seem to have developed a good hierarchy. There’s always some kind of commotion in there. Especially one of the Buff Orpingtons who will randomly flutter across the coop in a frenzy for no apparent reason. She is the same chick who would escape the brooder and is always trying to get through walls instead of doors so I think it’s safe to say we have a head crazy chicken in the flock. Here she is pecking at the mesh to get to the food (instead of going through the chicken door that’s RIGHT next to her…).

The coop was installed on what must have been the stormiest Sunday of the year. Jeremy from Dare2Dream farms who built the coop drove all the way from Lompoc. He was undeterred by what appeared to be “a little drizzle” and we were anxious to get the coop so we proceeded in spite of the weather forecast.

This picture doesn’t show the severity of the storm at all. Rain was coming in sideways and hard! As you can see I took this from the comfort of the house through a window:


When all settled down though we had this beautiful coop! It has a nesting and roosting area for the chickens, a shelter underneath for the ducks and two large runs that can be open for them to intermingle or closed off to keep the ducks and chickens apart. The duck run has a little tub for swimming, we will upgrade that to a big swimming trough once the lady ducks are fully water safe. The chicken side has a chicken water fountain.

IMG_0399  

It wasn’t quite ready for them to move in right away.  Dan spent a couple of days leveling it and digging a trench around the perimeter to recess hardware mesh in case of a digging predator. We put wood shavings in the coop and best boxes and a combo of shavings and mulch in the runs. 

At long last we brought everybody up and it’s such a relief! At first we kept the ducklings in a small coop just outside with their heating pad. They would never sit on it though, they would go to the closest corner to Mr. Drake and coo at him. Likewise he had no use for any of his space except to sit and swoon at his ladies.

IMG_0375-0

After a week or so we put them together and kept an eye on them until we were sure all was fine. He is always on guard and watching after them. We moved the heating pad into the wooden nest box in the duck shelter so they can all snuggle up. It’s been COLD outside! A couple days later we opened the door to let the chickens in with the ducks and they seem to be doing fine too. It was actually the ducklings that snapped at the chickens vs the anticipated other way around.

Currently they are all out there feasting on some overripe pumpkins and having a ball. I could watch them all day, they are hysterical! Maybe I’ll set up a chicken cam someday.The ladies have discovered the ducks heating pad here

IMG_0398

Although it’s not the free range rotating pasture set up I had imagined it’s what will work for us now given our predators. We plan to set up the fencing still so we can let them out to roam and eat grass when we are home.

Stay tuned to get more scoop from the coop 

🐓🐤🐣🍳

Blue Cheese and Bacon Marmalade Sliders on Pretzel Buns with Roasted Rainbow Squash

Blue Cheese and Bacon Marmalade Sliders on Pretzel Buns with Roasted Rainbow Squash

We’ve had at least a three-peat on thanksgiving leftovers and, really ENOUGH with the stuffing and mashed potatoes already! It was good but it’s time for something dramatically different. And simple. And light, well sort of. How about small? Perfect! 

These rainbow squash came in our weekly CSA box and initially I thought I should just add them to our fall tablescape. Thankfully that didn’t happen because they are delicious!

I halved them with a cleaver and scooped out the seeds (and reserved those for treats in the poultry mansion). I poked a few holes in the skin with a fork and placed them skin side down on a baking sheet.  

  
Inside each squash went a little butter and sprinkled on top was cinnamon and chili powder. 


Into a 350 degree preheated oven for 45 minutes, brushing the butter over the squash halfway through. It’s a good thing most of these steps can be done with one hand since that’s all I usually have! Alexis (note the one shoe, and it’s always the same shoe missing) will know how to cook everything by kindergarten. 

    
For the sliders we used a pound of Five Marys ground beef, I’m turning into a broken record here but this grass fed beef tastes NOTHING like what you could buy in the store. A burger is not JUST a burger with this meat.  Add to the ground beef an egg, splash of Worcestershire  sauce and some seasoned salt. Mix that together, and really you need to dig in with your (very clean) hands to get it well mixed. 
  

Form into 6 small patties and grill on a smoking hot grill pan (or bbq, but it’s too cold out now here for that!). We like them rare so do 3 minutes on a side, flip add cheese (we used crumbled blue) and finish cooking for another 3 minutes while the cheese melts. Serve on a toasted pretzel bun and garnish with mustard and bacon marmalade. The bacon marmalade was a gift with our farm box. I’ll see about getting a guest post from Mary with that recipe. It was SO good. 


Perfectly not related to thanksgiving and a surprisingly light dinner! 

For bonus points coordinate the plaid placemats and napkins with your children’s flannels for you own winter family Abercrombie catalog.

  
Roasted Rainbow Squash

2 Rainbow Squash

1T Butter

1t Cinnamon

1t Chili Powder

Preheat oven to 350 degrees

Cut squash in half and scoop out seeds. Pierce the outside of the skin several times with a fork. Add 1/4T of butter to the hollowed out squash. Sprinkle with 1/4t of cinnamon and chili powder. Bake for 20 minutes. Remove from oven and brush the melted butter over the squash. Return to oven for 20-30 more minutes. 

Sliders

1lb Ground Beef

1 Egg

1T Worcestershire Sauce

1t Seasoned Salt

Pretzel Buns or Slider Rolls

Crumbled Blue Cheese

Condiments of Choice

Mix together the ground beef, egg Worcestershire sauce and seasoned salt. Form into 4-6 patties. Heat a cast iron grill pan until smoking. Cook patties for 3 minutes for medium rare. Flip, top with cheese and finish cooking for another 3 minutes. 

Served on toasted buns with condiments of choice.